Seamless Star Patterns on Dark Background
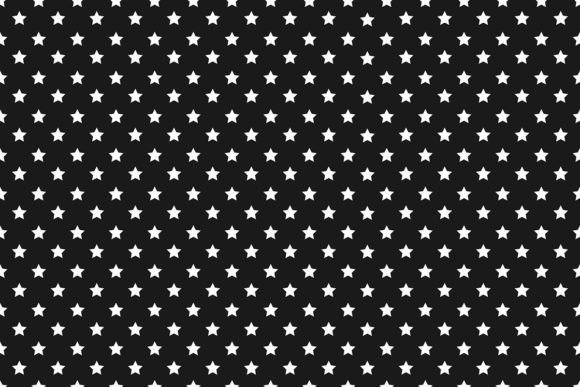
Seamless star patterns on dark background—especially black—are quietly powerful design assets. They add depth, elegance, and subtle cosmic energy to websites, presentations, branding materials, social media graphics, print layouts, and even physical products like apparel or packaging. Unlike busy or clashing textures, a well-crafted seamless star pattern works in the background without competing for attention. It supports content, enhances mood, and communicates sophistication—whether you're launching an app interface, designing a keynote slide deck, or refreshing your blog’s header.
Why “Seamless” Matters More Than You Think
A truly seamless pattern repeats flawlessly—no visible seams, no misaligned edges, no awkward gaps between tiles. Many people assume any star-filled image labeled “seamless” will behave that way. But in practice, poorly constructed patterns reveal their flaws when tiled across large screens or printed at scale. You might not notice it on a small preview thumbnail—but zoom out, stretch it across a full-width hero section, or scale it up for a poster, and suddenly there’s a jarring line where stars don’t quite connect. That break in continuity undermines professionalism and distracts from your message.
This isn’t just about aesthetics. A non-seamless pattern forces extra work: manual cloning, edge-blending in Photoshop, or re-timing tile offsets—all time-consuming fixes that delay launch or reduce consistency across platforms.
Color Isn’t Just “Black”—It’s Context, Contrast, and Compatibility
“Dark background” sounds simple—until you open the file and realize the base is #0F0F0F instead of true #000000, or that the stars are rendered in pure white (#FFFFFF) with no opacity control. That matters. Pure black backgrounds absorb light differently than near-black grays on OLED screens. Pure white stars can cause glare or accessibility issues against deep black, especially for readers with photophobia or low vision.
Also, many designers overlook how star color interacts with surrounding UI elements. A bright cyan star might pop beautifully on black—but clash horribly with your brand’s navy blue buttons or teal accent text. Worse, if you’re exporting for web use, unoptimized SVGs with embedded RGB profiles or unnecessary layers can inflate file size and slow down loading—especially on mobile.
The File Format Trap: Why One Type Isn’t Enough
You’ll receive a ZIP folder containing AI, SVG, PNG, EPS, and JPG files—and that variety isn’t just for show. Each format serves a distinct purpose:
- AI and EPS are ideal for print-ready scaling and editing in Adobe Creative Suite—use these if you need to recolor stars, adjust spacing, or integrate into larger vector illustrations.
- SVG is your go-to for responsive web use: lightweight, scalable, and styleable with CSS (e.g., changing star color on hover). But only if the SVG is clean—no embedded raster images or redundant paths.
- PNG works well for quick mockups or platforms that don’t support SVG—just make sure it’s exported at multiple resolutions (e.g., @1x, @2x) for sharpness on retina displays.
- JPG should be avoided for patterns unless absolutely necessary—it compresses gradients and introduces artifacts along repeating edges, making seams more obvious.
A common oversight? Assuming the PNG is “ready to drop in” without checking its dimensions and DPI. A 1000×1000 px PNG at 72 DPI looks crisp on screen—but blurry when scaled to fit a 4K banner or printed on matte paper.
Customization Is Built-In—But Only If You Know Where to Look
The ability to customize colors, star density, size variation, and spacing isn’t optional—it’s essential. Yet many users download the files and stop there, applying the default version without testing alternatives. For example, reducing star opacity from 100% to 70% can soften visual noise while preserving depth; switching from sharp-edged stars to slightly rounded tips adds warmth and approachability.
Here’s a practical test before finalizing: overlay your chosen pattern on actual content. Paste real headlines, body text, and CTAs over it—not placeholder lorem ipsum. Does readability hold up? Does the pattern recede enough to let typography breathe? If your call-to-action button disappears into the star field, dial back brightness or increase contrast between stars and background.
What to Verify Before Downloading or Buying
Before committing—even if it’s free—scan for these quiet red flags:
- No visible tile boundary markers in the preview: If you can’t see or infer the repeat unit (e.g., a grid overlay or labeled crop area), the seamlessness isn’t guaranteed.
- No stated resolution or scale guidance: A pattern labeled “HD” means nothing without context—is it optimized for 1920×1080, 3840×2160, or print at 300 DPI?
- Missing licensing clarity: Even free assets may restrict commercial use, resale, or SaaS integration. Check the license file inside the ZIP—not just the product page description.
- Single-color-only previews: If all screenshots show only white stars on black, ask: Can I shift to gold on charcoal? Midnight blue on slate? Without editing skills or vector access, you’re locked in.
Real-World Fixes You Can Apply Today
You don’t need advanced tools to improve results. Try these immediately:
- In Figma or Adobe XD: Import the SVG, then use “Repeating Grid” with exact tile dimensions—this prevents accidental stretching and keeps alignment tight.
- In CSS: Use
background-image: url(pattern.svg); background-size: 120px 120px;—then tweak the size value until stars feel balanced, not overwhelming or sparse. - For email templates: Swap SVG for a high-res PNG (with transparent background) and set fixed width/height—SVG support remains spotty in Outlook and older clients.
- When printing: Open the EPS in Illustrator, convert stars to outlines, and ensure all strokes are set to “overprint” to avoid white gaps on press.
Remember: Seamless star patterns on dark background aren’t decorative afterthoughts—they’re functional layers in your visual system. The right one saves time, strengthens tone, and scales gracefully across touchpoints. The wrong one creates friction: extra edits, inconsistent outputs, or unintended visual competition.
So take a moment before you apply it. Zoom in. Tile it. Test it with real content. Adjust contrast, color, and scale—not once, but iteratively. Because when a pattern truly disappears into the background—while still adding quiet impact—that’s when it earns its place in your toolkit.